45 days
avg. substrate to shelf
2 flushes
per substrate block
< 10%
moisture target, all product
"We are the farm. We are the lab.
We are the shop."
Inside the facility.
Clean rooms, clean product
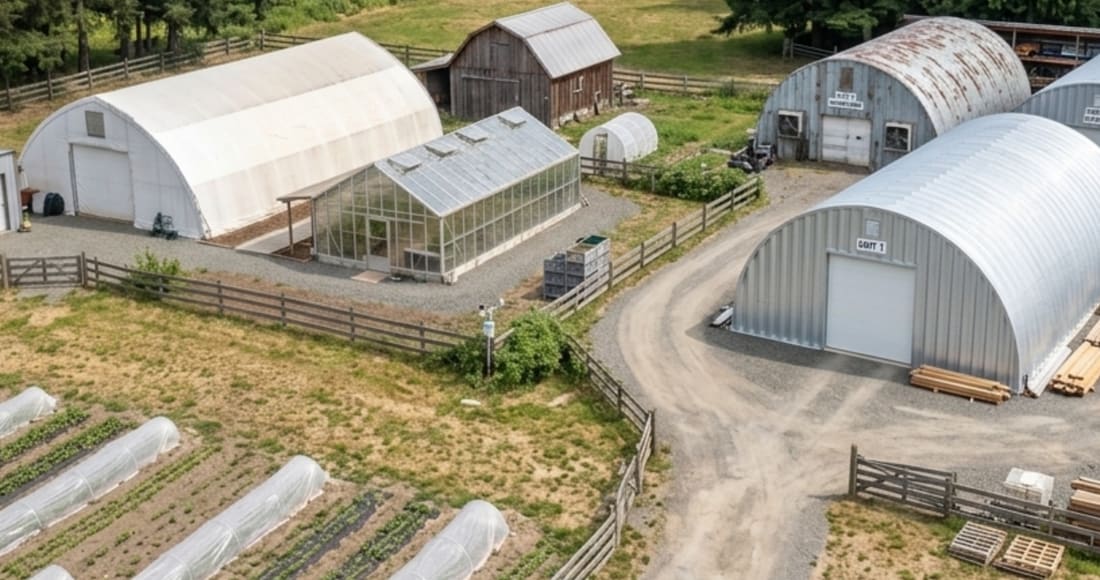
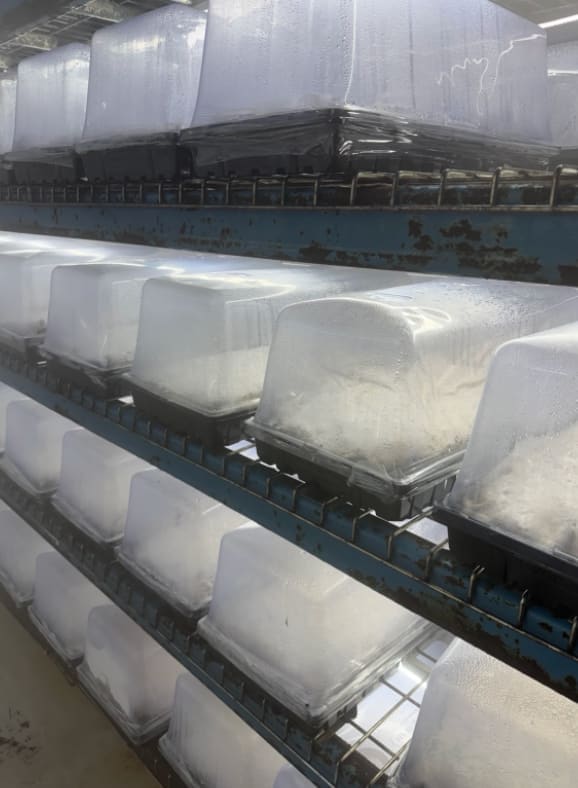
The Farm
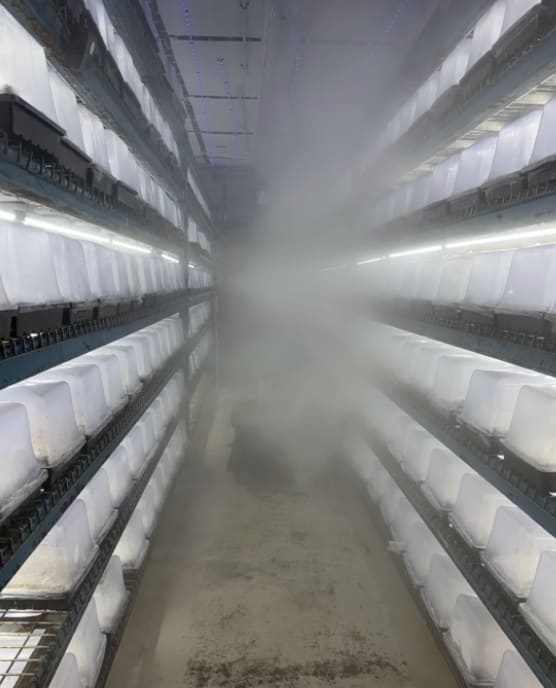
Fruiting Room
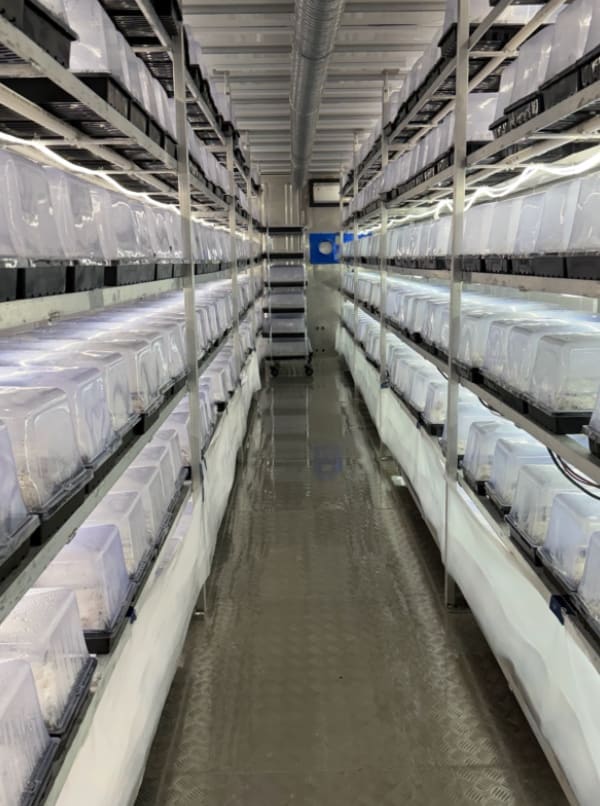
Grow Room A

SUBSTRATE PREPARATION
The Foundation
It starts on an agar plate. The plate carries the original genetics — a clean mycelium culture isolated from the source strain. That culture gets introduced to whole oats, sterilized at 15 PSI for two hours. The colonized oats become the grain spawn: the live starter that drives the whole run.
Every batch grows on the same bulk substrate: coco coir, vermiculite, and lime to hold pH — sometimes with cow manure added for nutrition. The bulk is pasteurized, not sterilized: 18 to 24 hours of sustained heat, then two full days of cooling. Once cooled, the colonized grain spawn gets introduced to the bulk to begin the main colonization run.
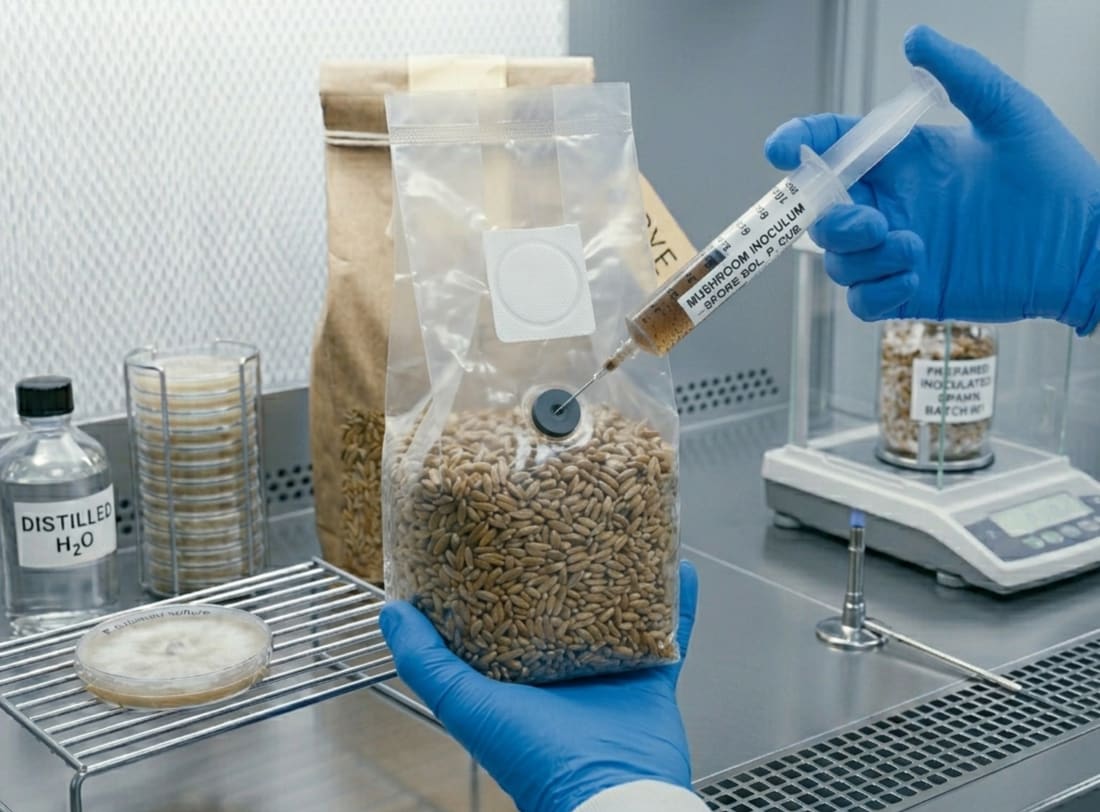
INOCULATION
Into the Bag
We do not use liquid culture. LC is fast, but it can carry bacteria or contamination that stays invisible until colonization is underway — by then, you've lost weeks. Instead, we work in a lab with 99.99% HEPA-filtered air and transfer grain to grain, or directly grain to substrate.
Every bag is dated and logged. Anything that shows green, black, or an off smell gets pulled immediately. Nothing moves forward until the transfer site looks clean.
COLONIZATION
The Waiting
After inoculation, everything goes into the incubation room — complete darkness, 72°F, no airflow. Over ten to fourteen days, the mycelium threads through the substrate. The spreading white is the sign. Anything green, black, or foul-smelling is not.
We check daily. The mycelium does not rush, and neither do we. Pushing colonization with too much CO₂ or heat produces weak threads and poor yields.
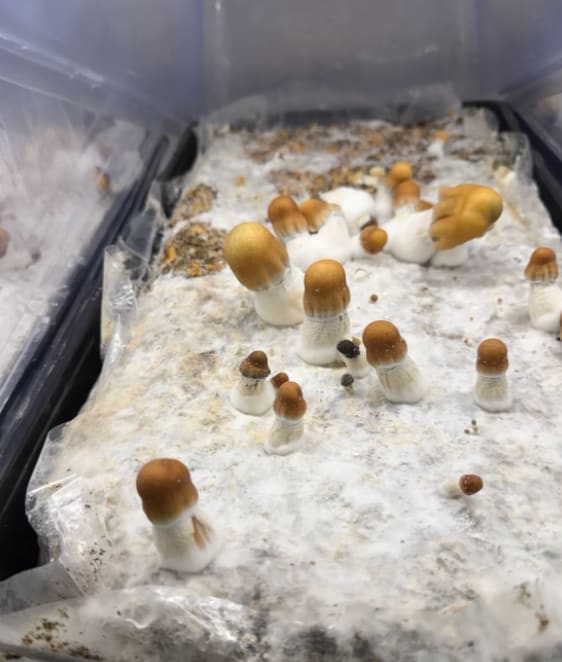
FIRST PINS
The First Sign
Pinning is triggered by environmental cues: fresh air exchange, a temperature dip, and indirect light. We move fully-colonized substrate into the fruiting chamber — higher humidity, 12 hours of indirect light, twice-daily fan bursts.
When the first primordia emerge — those tiny white bumps, barely visible — it means everything before this point was done right.
FRUITING CHAMBER
Full Growth
A flush takes five to ten days from pin to mature cap. The mushrooms grow in clusters, each cap developing at its own pace. We monitor daily, adjusting humidity and air exchange as the canopy fills in.
After harvest, the substrate rests and rehydrates for a second flush. Each block gives back what went into it.

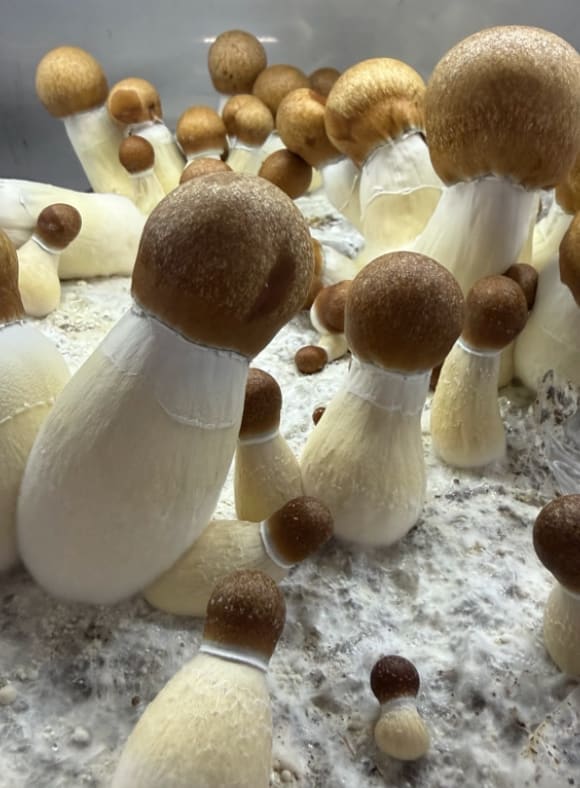
HARVEST
At Veil Break
Harvest timing is the whole game. Too early and the caps are underdeveloped; too late and they drop spores, losing potency and shelf life. We harvest at veil break — the moment the membrane just starts to pull away from the cap edge.
The twist-and-pull method protects the substrate bed. A clean pull leaves the substrate ready for the next flush. Gloved hands, every time.

DRY & VERIFY
The Final Check
Every batch goes into the dehydrator at 52°C for six to eight hours, down to under 10% moisture. We call it cracker dry — the stem has to crack, not bend. A batch that bends goes back in.
We record moisture content before bagging. We record date and flush number. Everything that leaves our hands carries a batch log. High moisture means mold. We do not let batches slide.
What we stand by
Know your source.
①
No middlemen
We grow it, dry it, test it, and ship it. There is no distributor, no broker, no co-packer. You know exactly where your mushrooms spent every one of their 45 days.
②
Test, don't trust
Moisture is measured before bagging — every batch. Contaminated bags are pulled before harvest, never after. We record what we find, even when it means writing off a run.
③
Small batches only
We do not scale beyond what we can monitor. Larger operations cut corners on FAE, harvest timing, and drying. We keep batches small so every block gets the attention it needs.